by Ron Roncone, DDS, MS
A self-ligating minor tooth movement appliance can treat nonfunctional cases in 6 weeks to 5 months
Orthodontics has changed vastly over the last 30 years, with innovations such as the straight-wire appliance, bonding of brackets, paperless offices, titanium wires, self-ligating brackets, CBCT scans, and lingual orthodontics.
Lingual orthodontics! “No, thanks.” That is the mind-set of those orthodontists who dabbled in lingual treatment almost 30 years ago. What has not changed is the desire of potential patients to seek cosmetic treatment that is quick, almost effortless for them, and cosmetic (think invisible).
For the last 4 to 5 years I have worked with Dentsply GAC® to develop a lingual bracket that simplified lingual treatment so that it could be part of every orthodontist’s practice. The most difficult part of lingual orthodontics was the tying-in of archwires—so the new bracket was designed to be self-ligating. At first, my intention was to assist orthodontists who were doing lingual, trying to save them time at the chair with an easy-to-open-and-close self-ligating bracket. Then, my frustration with aligners led to adapting this bracket to simple, non-functional cases such as orthodontic relapses, upper and/or lower mild crowding cases that functioned well, and cases that needed a cosmetic improvement where occlusion was not ideal but anterior alignment would not change or worsen the occlusion.
The lingual minor tooth movement appliance was born. It is not meant for everybody. It has a limited application—but there are millions of potential patients who fit this limited application.
Almost every day someone (a mother or father of a patient usually) asks if there is anything that can be done to make a patient’s front teeth look better without having to go through full, bonded orthodontics. My answer now is a resounding yes because of the bracket MTM (minor tooth movement) NO TRACE®.
Lingual Lessons
Why would an orthodontist choose MTM NO TRACE, especially after having bad experiences with lingual appliances in the past? There are many good reasons, but here are a few:

Figure 1: Expando cheek retractor
- There is a small learning curve.
- There are no complicated wires to bend.
- It requires no doctor time on a computer to plan tooth movement sequencing.
- There does not need to be any laboratory expense.
- Brackets can be placed directly in the mouth.
- Placement of upper and lower MTM NO TRACE brackets and placement of two archwires takes less than 30 minutes.
- Treatment can be completed in 6 weeks to 5 months.
- It is financially rewarding.
- Other than brushing teeth and showing up for appointments, no patient cooperation is required.
- In 80% of patients, only one wire is required.
- Placing archwires requires no double overties, etc. Open the clip and close it.
- Depending on the laws of where you practice, placement and removal of archwires can be delegated.
- Speech is not affected because of the small bracket design (1.5 mm in thickness).
- Because of the extreme incisal placement of the bracket, gingival irritation and hypertrophy is virtually nonexistent.
- PATIENTS WANT IT.

Figure 2: ETM posterior bracket placement instrument
Placement Technique
While I recommend indirect bonding with custom bases for full lingual, I strongly suggest that MTM NO TRACE be placed directly even for those practices that routinely used indirect on the labial.
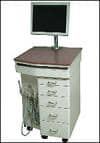
Other than the etch and sealant of your choice, you only need isolation retractors (we use Expando® cheek retractors, Figure 1) and a posterior bracket-placing instrument by ETM (Figure 2). The Expando has a tongue guard that works well for lingual bracket placement. The curvature of the bracket-placing instrument makes it usable for both upper and lower arches.
After preparation of the teeth is completed, the brackets are placed one by one (Figure 3 and Figure 4). A registered dental assistant (RDA) can place the brackets, and the orthodontist can subsequently adjust them. If you are light curing, the orthodontist can initiate the curing by passing the light over all the brackets. The RDA can then complete the curing process.
Dos and Don’ts
First, the dos:

Figure 3: Upper placement
- Do place brackets so that the bracket base is ideally no more than 1 mm from the incisal edge of the tooth from canine to canine (2 mm is the outside limit). The reason for this is that the lingual surfaces are very irregular and placement down on the cingulum can lead to labiolingual irregularities that clearly would be unacceptable. Also, do not think about placing the brackets farther from the cusp tip on the canine, as you might on the labial. Farther gingival placement on a canine engages a much steeper slope than on the lateral and central incisors, and therefore the canine will tip labially.
- Very often the canines have an exaggerated central cingulum. In these cases it is impossible to place the bracket correctly and you have to create a flat surface to bond the bracket to by bonding with composite the tooth on either side of the cingulum.
- In most cases I prefer to bond the first premolars also. This gives me more latitude and more choices. For example, if the incisors need to be tipped labially it is much easier to add an “advancing” crimpable stop mesial to the premolar (Figure 5) than it is to the canine because there is significant space to do so.
- In most cases a .012 or .014 Sentalloy “mushroom” arch should be the first wire (sometimes the only wire).
- A straight .012 Sentalloy can be used for specific circumstances. It should never be left in place for more than 5 to 6 weeks. If it is kept in longer, the premolars or canines (the last tooth bonded) will move labially to a significant degree. If this does occur, it can be corrected by placement of a preformed .014 Sentalloy mushroom arch (Figures 6 and 7).
- Since the lower first premolars rarely have lingual cusps of any size, you must build up that cusp so that the tooth does not super-erupt because of the incisal placement on centrals, laterals, and canines.
- Use Sentalloy “stop wound” open coil springs (Figure 8) to assist in making space.
- Use bite opening “blue” Neobond (which is included in the Introductory Kit from GAC) on the occlusal surface of upper molars so that lower incisors will not hit and distort the lingual brackets on the upper incisors (Figure 9). This does not cause any detrimental effect to the teeth or bite because it is used for so short a time. This step is not necessary in full lingual treatment because the brackets are placed more gingivally with custom bases.

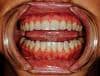
Figure 4: Placed brackets
What about the “don’ts”?
- This is a cosmetic procedure only, so don’t even think about placing a rectangular wire! If teeth need torque in order to satisfy you or your patient, you are using the wrong appliance.
- Don’t engage a tooth that is displaced labially to a significant degree initially. It will slow treatment progress significantly, since the wire pull is in a lingual direction (Figure 10).
 |
 |
 |
| Figure 5: Crimpable stops (“advancing” the wire) | Figure 6: Overexpansion of canines (wire was in 11 weeks because of patient illness) | Figure 7: Correction 6 weeks later |
 |
 |
 |
| Figure 8: Sentalloy “stop wound” open coil springs | Figure 9: “Blue” Neobond on occlusal surface of upper molars | Figure 10: Wire not engaged |
To read more articles by and about Roncone, in our online archives.
As long as you remember that this is a limited procedure and the patient understands the limitations of MTM NO TRACE, you will be fine. Start with very simple cases and progress from there. In an economy that is negatively impacting most orthodontic practices, this procedure can be financially rewarding with little overhead or orthodontist time necessary.
It takes less than 30 minutes to place upper and lower brackets directly and place two archwires. This truly is lingual you will love. And so will your patients!
Ron Roncone, DDS, MS, is in private practice in Vista, Calif. He has presented more than 600 seminars around the world and is president and CEO of Roncone Orthodontics International®. He can be reached at