I am often amazed at the ever-expanding and evolving technology changes in orthodontics. I’ll admit I’m a bit of a technogeek, having developed a practice management software over 25 years ago. I’m always quick on the draw to get any new version of the iPhone when it is unveiled.
One breakthrough that’s been a real game changer is the advent of digital scanning and 3D printing. It’s a technology that has been around long enough to make having a 3D printer in-house not only financially feasible, but it also offers increased practice efficiency and a pretty great ROI. My mission here is to share with you the basics and the benefits of 3D printing and the increasing use of in-house aligners.
How Did We Get Here
But let’s start with a little history. Aligners were first introduced to the profession in the late 1990s by Align Technology Inc (San Jose, Calif). They developed some rather advanced 3D tools to simulate tooth movement in progressive stages of correction. In the beginning, PVS impressions were required. This process was, however, challenging for the professional, unpleasant for the patient, and expensive and time-consuming for Align Technology.
Then Align Technology—makers of Invisalign®—bought CADENT®. CADENT had developed the iTero® intraoral scanner. At first, it was used as a diagnostic tool and an indirect bonding lab service. However, when 3D printing started to evolve, 3D scan files from the iTero scanner were used to produce the very first aligners. The acquisition of CADENT set the stage for an explosion of the technology.
Now that in-house 3D printing is available, fewer practices are sending STL files to outside labs for model printing. What was once a 10-day to 2-week process can now be achieved in less than a day. Along with saving time, creating in-house aligners from digital scans also lessens the chance for human error, is more precise than impressions, and reduces infection control concerns.

Easy file preparation from scanner to 3D printing.
Step-By-Step
Just in case you’re not as familiar with the process, let me offer a quick step-by-step overview of how to bring aligners in-house using a 3D printer in your office:
Step 1: An intraoral scan is taken.
Step 2: The digital model is imported into treatment planning software. The data is cleaned up, and a treatment plan is generated by the doctor. This plan is a staged model sequence of 3D models showing the progressively corrected alignment of the teeth. Treatment can be done in as little as two to three steps or more, depending on the severity of the malocclusion.
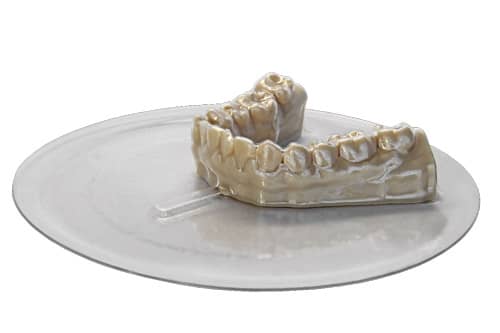
Step 3: Now we’re ready to print. We export the file for each stage to the 3D printer. The staged models in the treatment plan are then printed out.
Step 4: The final step is the use of a thermoforming machine, which adapts the aligner material to the printed model for each stage. The aligners are trimmed smooth and are now ready for the patient. Removing the human factor from the equation obviates retaking impressions or incurring the expense of redoing an appliance.
The future for aligner fabrication will include bypassing the third and fourth steps and directly printing the aligner, rather than a model of the teeth. However, it’s not yet approved by the U.S. Food and Drug Administration (FDA) nor economically feasible. Happily, it’s an advancement that is on its way.

The Vida printer prints vertically and hollow, creating space and cost efficiencies for the practice.
Perks of the Process
One perk that I quickly discovered about digital scanning is that I am able to create a scan in about 10 minutes. From there, I can show the patient—while they’re in the chair—their scan and provide an accurate illustration of the steps we’ll take for their realignment. It’s very accurate and even helps generate patient excitement about the process since they better understand the treatment plan and the desired results. They also love the idea of fewer visits and less time in the chair.
I wanted to learn more so I turned to a couple of industry experts. They were both enthusiastic about the future of in-house aligners. One story they shared was about a woman whose son lived in a city some 1,000 miles away and had lost his aligner. She was desperate to get a replacement. The orthodontist was able to pull the son’s digital file and print the aligner that afternoon. He then boxed up the appliance and overnighted it to the son. Less than 28 hours between losing it and replacing it.
If you’re considering in-house aligners, here are a couple of thoughts to consider. First, depending on how many aligners you make, it would be a wise move to hire a new staff member who can become totally devoted to it. You’ll need space for a lab. Storage shouldn’t be as big a problem as it is for stone models. You’ll require less space for the new aligners than the models. I’m delighted to tell you how great it is to have digital files that are immediately available instead of digging through paperwork and x-ray files trying to find a case for review.
Just as each practice is unique, so are the options for 3D printing. A good printer rep can guide you to get the most bang for your buck in your specific practice situation. Required elements for 3D printing include an intraoral scanner, camera, 3D printer, vacuum former, and 3D imaging software.
Final Thoughts
In conclusion, let me share three final thoughts for you to bear in mind if you’re looking at in-house aligners:
- Workflow change—Digital dentistry is here. It’s not the future. It’s now, and it has really raised the bar for our profession. Embrace the change. Once you’ve learned it, in-house aligner production can deliver new revenue sources while increasing the quality and efficiency of your practice.
- The equipment—The cost of setting up a lab is a solid investment. Colleagues and industry partners can help you with the process.
- How deep do you want to go?—Each practice is different. There are many options when it comes to maximizing your investment.
I hope this information gives you a better feel for the benefits of in-house aligners. I would like to thank those who shared their time and expertise with me. Thank you to Michael Stewart, DDS, of Atlanta Orthodontic Specialists. Stewart has always been a pioneer in new technology and has been very active in the advancement of 3D printing. I’d also like to extend my appreciation to Jay Phelps of 365 Printing and Arlen Hurt of Specialty Appliances. I consider them my 3D printing Superheroes. OP
 Mark S. Sanchez, DDS, is the founder, CEO, and chief developer of tops Software. He practices in one of Atlanta’s leading orthodontic offices, and is the only programmer of orthodontic practice software who actually uses such a product on a daily basis. Sanchez developed his programming skills while pursuing a doctorate in physics at Georgia Tech. He earned his dental degree and certificate in orthodontics at Emory University.


