The strategies and mechanics that lead to more favorable outcomes in non-extraction “borderline” cases
By Chad Foster, DDS, MS
Times change, treatment evolves, and the hot topics in orthodontics do as well. We’ve gone from the age of banding every tooth to in-office 3D printing and everything in between. There is one debate, however, that seems to have weathered the test of time in our profession: The age-old question of extraction or non-extraction in cases that are “borderline” or could potentially be treated either way. These cases most often involve either significant crowding, protrusion, or both. No other topic in residency programs, professional study clubs, and online orthodontic forums raises blood pressure and elevates emotions quite as quickly.
Non-extraction treatment in “borderline” cases has, at times, earned a bad reputation in our profession. Historically, certain orthodontic companies and orthodontists favoring non-extraction have pushed aggressive marketing, exaggerated claims, and an “all-or-nothing” perspective, leading to a real polarization of this issue.
There has been pushback from orthodontists favoring a more traditional extraction approach. Some have at times characterized a non-extraction approach as throwing brackets and wires on crowded teeth, dumping the anteriors forward, and finishing with aligned teeth and a poor outcome. In essence, avoiding tooth extraction at the expense of a well finished esthetic and functional result.
But are there certain strategies and mechanics that lead to more favorable outcomes in non-extraction “borderline” cases? I definitely don’t have the word count available in this article to give this topic the full justice it deserves, but what I do hope to provide are a few tips from my experience in these situations.
Here, I will review three adult cases that push the limits of what might be considered “borderline.” Each case has its own unique differences and its own specific treatment strategy that will be explored through the presented clinical tips. One strategy they all share is one most common to a non-extraction approach—ie, dental arch expansion to gain arch length for alignment of crowding. In my experience there are certain ways to maximize this arch expansion most effectively.
Even if you would prefer a different approach to these borderline cases, I hope you can still take away something helpful from these cases and the discussion that follows.
Tip #1

Figure 1: Comparing an extra-wide shape wire, a Damon/universal wire, and standard ovoid wire.
For dental expansion in a patient past the age of traditional orthopedic palatal expansion, where expansion needs to be maximized, self-ligating brackets are my appliance of choice. In my Phoenix-based practice, I use both Altitude (passive self-ligation) and Alpine (active self-ligation) brackets, both by Rocky Mountain Orthodontics. With regard to wires, I use “extra-wide” NiTi wires. It is important to note that these wires are even more broad than what are typically referred to as “Damon” or “universal” wires. A comparison photo of an “extra-wide” shape wire, a “Damon/universal” shape wire, and a standard ovoid wire is shown in Figure 1. The width of these initial wires is of particular importance because I believe the NiTi wire phase (leveling/aligning phase) is the time when maximizing arch expansion is most advantageous and biologically favorable. Expansion can always be achieved later in treatment by way of over-expanded stainless-steel wires, but by this point in treatment (post-leveling/aligning), if the needed expansion has not already been achieved, two unfortunate consequences are much more likely. First, if efficient expansion was not maximized during and throughout the leveling/aligning phase, it is much more likely that greater proclination of the incisors occurred than if significant early expansion had accompanied alignment. Second, if light force expansion was not maximized early on, expansion in the much heavier finishing wires will likely require higher force levels to achieve the same expansion, which comes with a greater risk of periodontal consequences.
I typically start with a 14 “extra-wide” NiTi wire that is active for the first 2 to 3 months of early alignment. I then progress to a 20×20 “extra-wide” NiTi wire, leaving it in for an additional 6 to 8 months. This is also the wire I use throughout my pano/repo appointment. My third and final wire is an 18×25 TMA “Damon/universal” shape that I slightly customize in width and shape to suit the individual case goals. By the time this final wire is placed, the majority, if not all, of the necessary archwire expansion has been achieved. In regard to maximizing early light expansion, particularly in the leveling/aligning phase, I have found this method to be most beneficial.
Tip #2
In certain cases, with significant upper arch crowding and/or upper arch dental protrusion, electing to invert (“flip”) upper incisor brackets to reverse torque, and thus engage more lingual crown torque, can have significant benefit. In Case 1, this technique was employed and was combined with dental arch expansion and properly timed interproximal reduction. We began with normally oriented upper incisor brackets and decided to flip them at the pano/repo appointment. This in large part allowed us to actually achieve very slight uprighting of the patient’s upper incisors in a case where unfavorable further proclination might have been the expectation with a non-extraction plan.
Case 1: Initial


Case 1: Start of treatment


Case 1: 27 months, final


Case 1: 12 months post-treatment


Case 1: Before and after ceph images

Tip #3
As a general rule, when a canine is fully blocked out to the labial, I find it best to make room for the tooth first prior to aligning. If a labial canine is engaged with the initial archwire, there is a tendency for flaring forward the neighboring teeth and also the possibility of introducing an anterior occlusal cant. This is the approach we took with the upper right canine in Case 1.
If the blocked-out tooth is lingual, however, I almost always engage it immediately with the first archwire instead of opening space first. A lingually displaced tooth acts somewhat as an anchor to limit flaring of neighboring teeth as the lingual tooth is brought into alignment. At the same time, if there is an expansive force present via broad archwires, this delay in anterior proclination allows better opportunity for early gains in arch width.
Tip #4
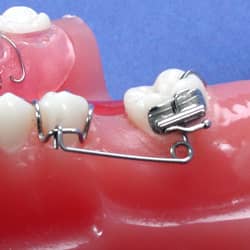
When a lingual tooth is almost completely blocked out, using an eyelet instead of a bracket is an excellent way to engage the tooth with less archwire distortion, lighter forces, and thus very efficient tooth movement. If you have not used eyelets in this manner, this tip alone can be a game changer! Case 2 and Case 3 show lingually displaced incisors engaged with eyelets.
Case 2: Initial


Case 2: Start of treatment


Case 2: 25 months final


Case 2: 6 months post-treatment


Case 2: Before and after ceph images

Case 2: Before and after pano

Tip #5
When considering significant dental arch expansion in cases like the ones presented here, evaluate the periodontal biotype of the anterior teeth as well as the buccal premolar area where much of the expansion will occur. Does the tissue overlying the roots appear thick, normal, or thin? Do you notice pre-existing recession? Visual evaluation does not replace the importance of other periodontal diagnostics such as radiographs and probing depths, but it can be a good place to start.
In diagnosing Case 1, I observed a thick horizontal buccal “band” of hard and soft tissue that ran the entire length of both arches. This very specific biotype is quite favorable to dental arch expansion. In diagnosing Case 3, I noticed a generalized, very thick periodontal biotype which also is favorable for expansion.
Meanwhile, Case 2 displayed what I would grade as a “normal” biotype—not as thick as the other two patients. While this patient’s gingival health at debond and 6 month follow-up appears improved compared to her initial photos, I do note mild recession at the upper first premolars (the teeth requiring the most expansion), which, in retrospect, might have been less likely if she had the benefit of the biotype the other two patients displayed.
Tip #6
When considering significant dental arch expansion in cases like the ones presented here, evaluate the lingual inclination of the posterior teeth, particularly the premolar area. In all three of these cases, I would grade the premolars as having excessive lingual crown torque. Simply uprighting these posterior teeth to the buccal poses a great opportunity for much needed arch expansion.
Tip #7
Within the “smile window” how well does the transverse display of the teeth project? Is the width displayed by the teeth in harmony esthetically with the width of the “smile window”? Are dark buccal corridors present and detracting from the smile? Mini-esthetic (smile) evaluation of all three patients presented here revealed significant expansion would be of great esthetic benefit as well as a means to create much needed arch length. In my opinion, the arch width gained in all three patients complements their final smile esthetics as much or even more so than the alignment of the severe crowding.
Tip #8
What do the lips speak to you? What does the Facial Front photo and Facial Profile photo reveal about the patient’s macro-esthetics (facial esthetics)? As we all know, the lips factor significantly into the extraction or non-extraction decision.
Lips were the major deciding factor for me in treatment planning Case 2. This patient shows an obtuse nasolabial angle, slight Class II profile, and a thin upper lip that would make me nervous about any small degree of anterior retraction. In her particular case, the mild advancement of the anterior teeth that accompanied her non-extraction plan was planned and anticipated to be a macro-esthetic benefit which I think shows very well on her lips in the final Facial Profile photo.
Case 3: Initial


Case 2: Start of treatment


Case 3: 11 month progress, upper occlusal

Case 3: 23 months, debond


Case 3: Before and after ceph images

Case 3: Before and after pano images

Tip #9
Are the micro-esthetic contours, size, and shape of the incisors appropriate to consider interproximal reduction? The fact that none of the three cases presented here displayed what I would consider small or undersized incisors (with the exception of upper laterals in Case 3) helped tip the scales in favor of a non-extraction approach. Interproximal reduction offered an opportunity to not only gain much needed space, but also recontour the contacts of these incisors for the benefit of micro-esthetics.
Tip #10
In my 10 years in practice, I have treated cases with twin brackets, self-ligating brackets, and wires of varying shapes. In that time, I’ve noticed something unique that occurs when self-ligating brackets are paired with broad shape wires, particularly “extra-wide” wires in the NiTi phase. In cases that began with severe crowding, after the 20×20 “extra-wide” NiTi wires have been left in place for 6 to 8 months, not only will the teeth have achieved alignment, but occasionally they will actually show spaces opening as the arch expansion reaches its full potential in these wires. Case 3 shows this occurrence in the upper occlusal photo from 11 months into treatment as we are just going into stainless steel wires. This is more of an observation than a tip, but I believe it speaks to the early expansion potential of pairing “extra-wide” wires with self-ligating brackets. OP
Chad Foster, DDS, MS, is a board certified orthodontist and owner of Butterfly Orthodontics in Phoenix, Ariz. He is a graduate of Chapman University and has a Doctor of Dental Surgery, Master’s degree in craniofacial biology, and graduate orthodontic residency from the University of Southern California (USC). He was a part-time faculty member at USC Dental School. He currently serves as primary orthodontist for HonorHealth hospital system in Arizona. He lectures internationally on the topic of orthodontic esthetics and is a KOL with Rocky Mountain Orthodontics.