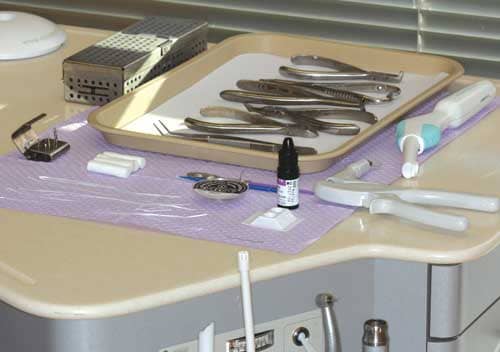
Figure 1: Prepared workstation.
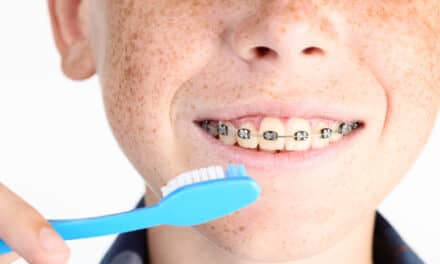
Bonded lingual retainers provide an adequate means of maintaining anterior tooth position relatively independent of patient cooperation. These retainers may be considered for patients with anticipated noncompliance, anterior spacing associated with a forward tongue thrust or thick gingiva, severe malrotations, ectopic canines, compromised periodontium, following therapeutic expansion of mandibular intercanine width, consolidation of extraction spaces in adults, or prolonged Invisalign® (Align Technology Inc) therapy to enable posterior settling.
Despite the many indications for bonded retention, these retainers are only effective if they remain failure-free. Remarkably, reports indicate that one-half of maxillary retainers and one-fifth of mandibular retainers fail in some form, either debonding or breakage.
While there are numerous reasons for retainer failure, this article focuses on the bonding technique. We will provide a step-by-step clinical guide for the two-handed, direct-bond method. Key areas will be highlighted, such as: delegation of duties, isolation, preferred luting agents, and cleanliness of the final retainer.
Workstation Preparation
The side-chair delivery unit is set up prior to the arrival of the orthodontist (Figure 1). The handpiece is connected with the appropriate bur inserted, as well as the high-speed suction tip and saliva ejector. The tray is organized with four cotton rolls, five strands of wax-free floss, a mixing well, a microbrush, an Adper™ Prompt™ L-Pop™ Self-Etch Adhesive (3M Unitek), etchant, primer, luting agent, and the instruments neatly laid out. Though it is seemingly redundant, we will explain later in the paper why we recommend having the individual etchant and primer, as well as the L-Pop Self-Etch Adhesive.
For the two-handed method, it is imperative that everything is easily accessible and within comfortable reach. Moisture contamination may occur if the orthodontist is required to open the instrument kit, search for instruments, or reach for the curing light. The doctor’s focus always needs to be on maintaining isolation.

Figure 2A to 2R (left): The “two-step,” “double-etch” technique. A. Assistant etches. B. Etchant contained between marginal ridges. C. Patient rinses with water but does not brush. D. Assistant measures retainer on the labial. E. Orthodontist thoroughly dries bonding region. F. L-Pop Self-Etch Adhesive. G. L-Pop applied to etched enamel. H. Transbond LR. I. Transbond MIP Moisture Insensitive Primer. J. Transbond LR paste mixed with Transbond MIP primer to reduce viscosity. K. Pin-drop amount placed on the teeth to position the retainer. L. Retainer resting passively. M. Spot cure to secure position. N. More paste mixed with primer neatly dripped over the retainer. O. Full cure. P. Retainer thoroughly cleaned with an ultrathin diamond bur. Q. Cleanliness confirmed with floss. R. Final retainer.
The Assistant’s Duties
The first step is for the assistant to place the etchant (Figure 2A to 2R). The etchant should not extend interproximally. No retractors or cotton rolls are placed at this time. If the oral hygiene is poor, the teeth can be sandblasted prior to etching. If bleeding occurs around the gingival margin following sandblasting, the appointment may need to be rescheduled to the following week. After etching for 30 seconds, the material is removed with a high-speed suction and copious irrigation. It is important not to have any etchant droplets contact the lip or skin to avoid dermatitis. The assistant now guides the patient to the brushing station to rinse their mouth with water, but not brush their teeth.
[sidebar float=”right” width=”175″]
Download a PDF of Kravitz and Shirck’s “two-step,” “double-etch” technique. [/sidebar]We ask the patient to rinse their mouth because it helps eliminate the bitter taste from the etching process and decreases the amount of saliva pooling during the bonding step. The patient is instructed not to brush their teeth for two reasons: (1) because we do not want to risk damaging the enamel prisms formed from the etchant, and (2) we do not want to introduce fluoride into their mouth, which may reduce bond strength.
When the patient returns to their chair, the assistant measures the length of bonded retainer. Length of a lingual retainer is measured on the labial surface, from the midpoint of one end-tooth to the mesial embrasure of the other end-tooth. For example, a lingual retainer extending canine-to-canine is measured on the labial surface from the midpoint of one canine to the embrasure between the opposite side lateral and canine. Measuring to the embrasure on the labial surface approximates the shorter arc on the lingual.
The benefits of this “two-step” method—having the assistant apply the etchant and measure the retainer prior to the orthodontist sitting down for the bonding appointment—include: (1) the assistant can determine if the oral hygiene is too poor to receive a bonded retainer at this time, (2) the doctor can focus on isolation during the bonding step, (3) doctor chair time is reduced by 50%, (4) the shorter bonding appointment makes it easier for the patient to keep their mouth wide open, and, most importantly, (5) because the mouth is only open for a short period and there is no taste of etchant, the patient does not excessively salivate during the bonding step.
The Bonding Step With Simplified Isolation
The orthodontist now arrives at the patient chair to bond the lingual retainer. A prospective clinical study by Kravitz has shown significantly higher bond success when the orthodontist places the retainer, rather than delegating this step. The orthodontist’s primary focus will be on maintaining isolation. There are numerous retractors to control salivary flow; however, we advocate a simple isolation technique using two cotton rolls to push away the lip and a saliva ejector to press down the tongue and control sublingual salivation. The orthodontist may consider having the patient bite into an inverted large Dri-Angle® (#259-7888, Patterson Dental) to prevent saliva from squirting from the sublingual duct. Air is then thoroughly sprayed on the lingual surfaces of the etched teeth, as well as the labial surfaces and the lip, to ensure the bonding region is dry.
If the lingual surfaces of the etched teeth are not completely desiccated, the L-Pop Self-Etch Adhesive can be used to provide a second etching. We like to refer to this step as a “double-etch” technique. The L-Pop Self-Etch Adhesive ensures a thorough etch, and may provide the secondary benefit of controlling bleeding around the gingival margins. Furthermore, the initial etching improves the bond strength of the L-Pop Self-Etch Adhesive. If the lingual surfaces were thoroughly desiccated from the initial etch, the orthodontist may choose to skip this step and simply place primer, such as Transbond™ MIP Moisture Insensitive Primer (3M Unitek) or Assure Universal Bonding Resin (Reliance Orthodontic Products Inc).
Now the orthodontist will have to decide whether or not to use floss interproximally to secure the retainer during the bonding step. The decision to use floss is dependent on: (1) the retainer material, (2) the luting agent, (3) the alignment or lingual anatomy of the teeth, and (4) the patient’s oral hygiene.
For example, a flat chain will rest passively on the teeth, while a twisted ligature or braided wire will often need to be secured with floss. Likewise, floss is often indicated if a flowable luting agent, rather than a paste-type luting agent, is used for the initial cure. If the teeth are not adequately aligned or simply have large marginal ridges, floss is helpful for contouring the retainer tightly against the lingual anatomy. However, if the oral hygiene is poor, threading floss often traumatizes the gingival margins and induces bleeding.
The teeth have been etched and primed, and the orthodontist is now ready to lay the retainer. For the no-floss method, a pin-drop amount of a paste-type luting agent, such as Transbond™ LR (3M Unitek), is first placed on the lingual surfaces. This enables the retainer to rest passively before being secured with a spot cure. However, this step is unnecessary if floss is used. A drop of luting agent is then placed overtop the retainer on each tooth for stronger retention. Mixing primer with the paste reduces its viscosity and enables the material to flow nicely.

Figure 3. Cleaning under the retainer.
Cleaning the Retainer
Cleaning the retainer is an imperative step that is often neglected. Failure to thoroughly clean composite interproximally and around the gingival margins will inevitably lead to bond failure, as both the patient and the hygienist will forcefully try to thread floss through contact points. As mentioned earlier, a clean retainer starts with a clean etch. After the teeth are cured, an ultrathin diamond bur (#545-4558, Patterson Dental) used with copious irrigation can polish around the gingival margins and underneath the retainer (Figure 3). Flossing interproximally will confirm adequate cleanliness. The assistant can now take over to review oral home care instructions.
Conclusion
Despite the simplicity of removable retainers, there is a need for bonded retention in many of our patients. Orthodontists should consider incorporating small changes in their clinical protocol, such as the “two-step” method and the “double-etch” technique. Lastly, thoroughly cleaning around the retainer minimizes the chance of breakage during routine hygiene appointments. OP
 Neal D. Kravitz, DMD, MS, is a Diplomate of the American Board of Orthodontics and a member of the Edward Angle Honor Society. He lectures throughout the country and internationally on business ethics, practice management, lingual orthodontics, and biomechanics. He currently maintains three thriving orthodontic practices in South Riding and Ashburn, Va, and White Plains, Md.
 Jeffrey M. Shirck, DDS, MS, is in the private practice of orthodontics in Pataskala, New Albany, and Westerville, Ohio.